 |
| Awesome clocks? Or the MOST awesome clocks? |
As some of you may be aware, once upon a time I described myself as an artist. It was kind of my thing. I went to art school and I even dropped out! Like a REAL artist!
Kidding aside, I still love to pick up a paintbrush and make beautiful things. But finding the time is hard, so I prioritize. I do wedding portraits.
I like to make each portrait totally unique to the couple, and focus on things that were special about them, or their wedding, or the day in particular.
It's fun, and so far nobody has called me up and said, "Dude, this painting sucks. Can't you just get me towels off my registry like a normal person?"
Today I'll be teaching you how to make my new favorite gift every- the personalized dancing clock.
YOU WILL NEED:
Heavy duty watercolor paper
Pencil
X-acto knife
hot glue
paint (I prefer casein for this, in which case you'll also need an acrylic glaze)
Paintbrushes
Heavy duty scissors
Fine grain sandpaper
Popsicle sticks
Elvis clock, the swinging legs kind.

Believe it or not, these guys are ridiculously cheap. Seriously, go on ebay and search for them. Or better yet, go to a local thrift shop that benefits a charity that means something to you, and buy one. They're everywhere.
Choose a picture of your subject. Preferably dancing.

You're not going to end up with something that looks EXACTLY like that, but getting something where your subject's legs are apart and arms are close to the body is ideal.
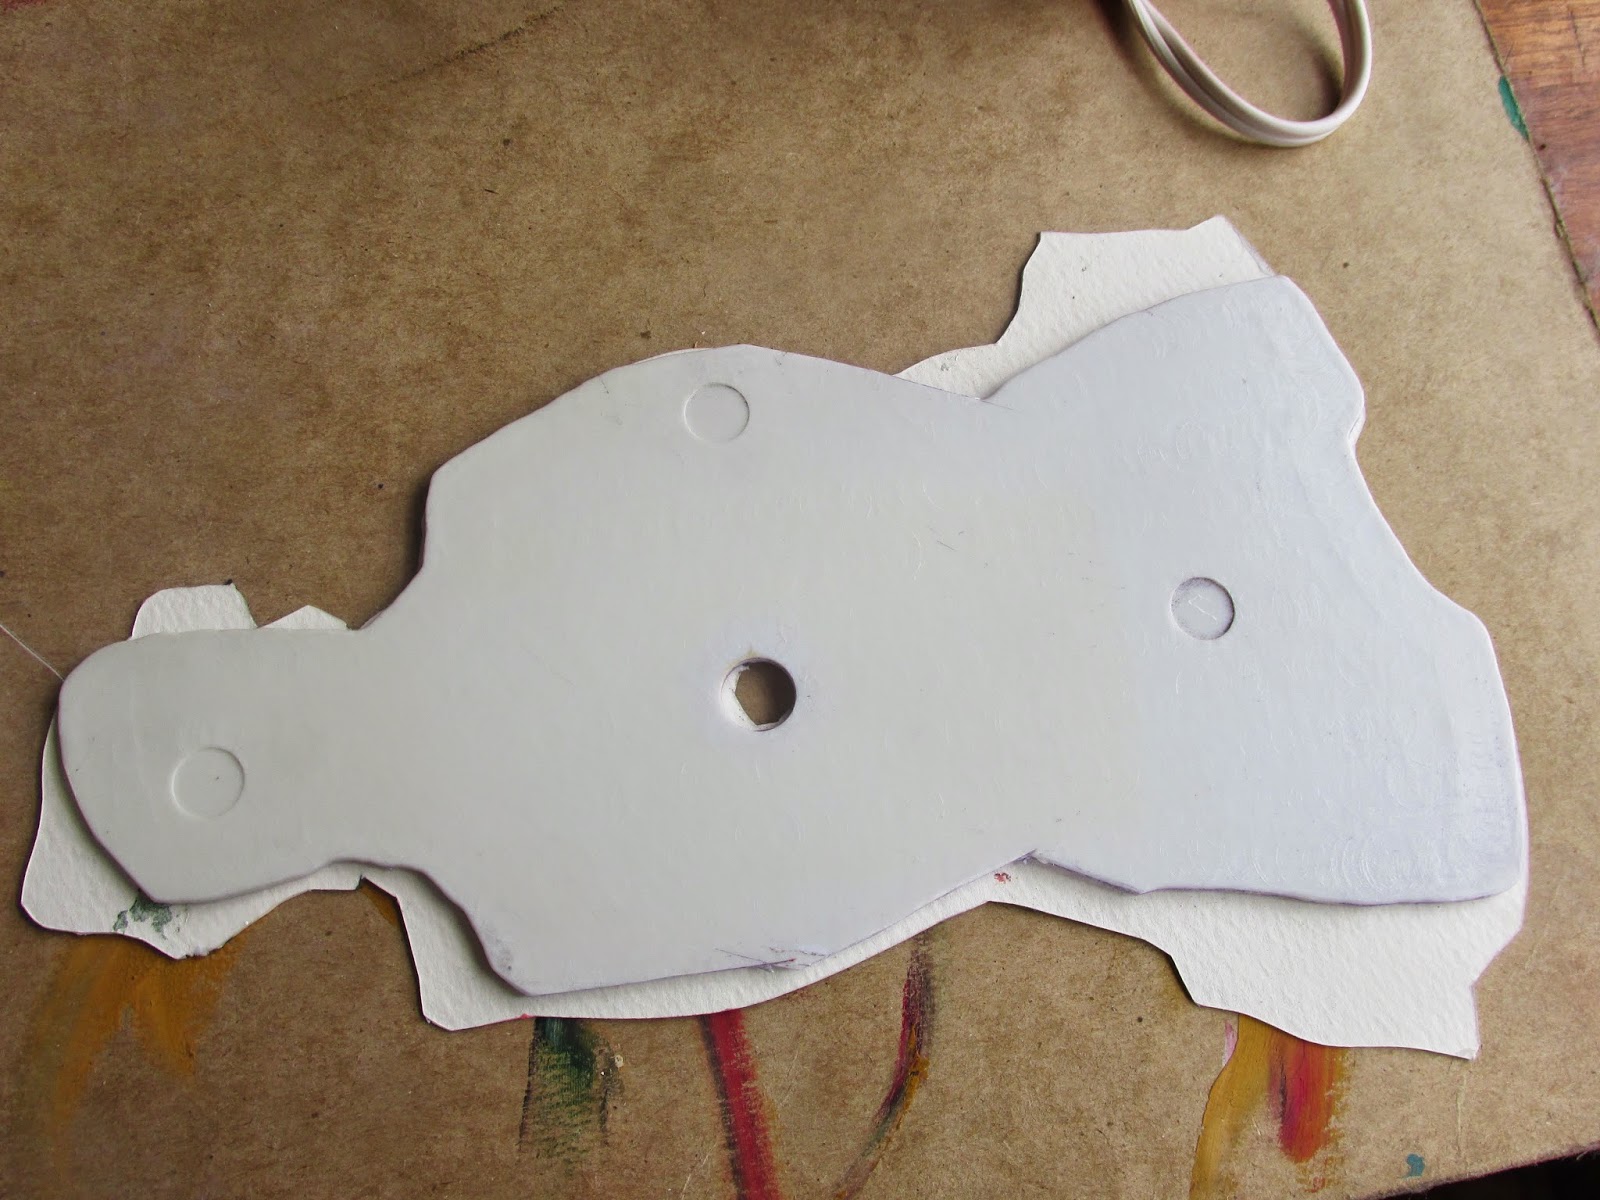
Now, take apart your clock.

To do this, you will unscrew the nut in the center that holds the clock together. It sounds like an unfathomably bad idea, but the way to remove the hands from the clock is to simply pull them off. Gently, but firmly. They will push back into place when your clock is in one piece again. With the nut removed, the clock will come apart into a box with the mechanism, the Elvis body, and a fistful of tiny parts you must be careful not to lose.
The pendulum of the clock is a simply hook. It lifts easily off the loop in the back, and that's all the disassembling you'll need to do.
Now comes the fun part. Chopping off Elvis's bits.

If you're lucky, you won't need to trim Elvis down at all. but if you're making a smaller dancing person, you'll need to trim off Elvis's boxy frame.
When you've got your altered Elvis pieces, it's time to trace them onto your paper in pencil. there will be much erasing after the fact, so draw lightly.
Once you've traced his parts, you'll draw the rest of your dancer around them. Keep lining up your drawings with each other, so you can ensure the pieces fit properly.
In this case, I started with legs/skirt that were FAR too long. By the time I lined up the parts properly, Elvis's crotch came about down to the skirt's hem.

In this case, I trimmed Elvis's shoulders and arms for my female dancer, and cut off one arm at the elbow for my male dancer. It's okay if your paper extends farther than your silhouette. Remember, you're not bound to put your dancer in the same position as elvis. For my female dancer, I turned the raise of Elvis's pompadour into the back of her head, by added her bun to the side. Use Elvis for scale- the head and arms will be in approximately the right place for any figure- but that's as tied to him as you're going to be.

Now you'll need to paint your dancers. PAINT THEM BEFORE YOU CUT THEM OUT!!!! If you cut them first, you may warp the paper.
If you look at the style of the Elvis clock, you'll note this doesn't have to be very realistic. In fact, it's best to try to keep it down to four or five colors. On Elvis, that often breaks down to white/black/purple/yellow/grey, or white/black/blue/grey. The face doesn't need to be well articulated, and you don't need much detail at all.
Think, outlines and a few blocks of color or shadow.
If you have a photo editing app, you can turn up the contrast and shadows on your original picture to give you a good idea where those colors and shadows should turn up.

I decided to use five colors- white, black, grey, brown, apricot, and yellow- plus a bit of extra for my bride's tattoos. I know, that's more colors than I generally recommend... but still not so many as to distract from the simplified art style.
Using an x-acto knife, cut out the silhouettes.

Double and triple check that your figures FIT on Elvis. When you're certain, trace the hole in Elvis's middle, and using the x-acto knife, cut the circles out of your figures.
Now, it's time to attach your painted people to Elvis's mangled body.
Begin by sanding down Elvis's body. You need a scuffed surface, or the glue will peel right off.

Wipe him down to make sure he's clean and dry- you don't want plastic and paint dust ruining your clock at the last minute!
Set your glue gun to "high" heat. Let your glue get REALLY REALLY hot. The hotter, the better.
Now, quickly and carefully, make a line of hot glue about a quarter inch from the border of Elvis, all around the perimeter, and a little in the middle for good measure. As quickly and carefully as you can, put the painted dancer on top, and press down firmly.
You'll have a split second to adjust as you lay it down, so remember to check the hole, the head, and and the corners to be certain Elvis is lined up properly as you lay down the paper.
Next, IF you have a figure who's legs don't have Elvis backing, cut down some popsicle sticks and hot glue them to the back. You'll want to make sure they're supported, to protect them from tearing.
Now, as I said before, I used casein paints. I like them for this project because casein is matte, which helps with the sort of comic-book look, and because it's the most uniform medium I know. Casein paint practically eliminates brushstrokes, the color is so consistent. I also LOVE that it dries faster than any other paint on earth. This keeps the paper from warping, and also lets you manhandle your project sooner. The only problem with it is that it's fragile, so if needs a varnish of sorts on top before you can finish the clocks.
I used an acrylic medium to "fix" the pigment to the paper. I like this particular medium because it is also matte, and because it is also very lightweight, and because it also dries quickly.

Once your clock parts are dry, it's time to put them all together again. First the body, then the washer, then the nut, and when that's screwed back down, the clock hands. These are pressed into place firmly, hour first, then minute, then second. To check if you've attached them properly, rotate the minute hand. The hour hand should follow. If not, press down harder- but still gently, You don't want to bend them.
Hook the legs back onto the loop in the back, and insert batteries.
You are now the owner of a beautifully personalized dancing clock.


That is a riot and such a fun gift!
ReplyDeleteThank you! And so easy! You should try it!
DeleteCUUUTE!
ReplyDeleteOMG these are DARLING!
ReplyDeleteThank you!!! They're actually really easy too! Give 'em a shot!
DeleteSuper cute, plus any chance you get to cover up elvis is a BONUS !!
ReplyDelete